Key Takeaways
- A dental crown is a custom-made cap that protects and restores a damaged tooth’s shape, size, and function.
- Tooth preparation involves carefully removing 1-2 millimeters of enamel under local anesthesia to create space for the crown.
- Digital scanning technology now allows for more precise, comfortable impressions compared to traditional putty methods.
- A temporary crown protects the prepared tooth during the 1-2 week period while the permanent crown is being fabricated.
- With proper care and maintenance, dental crowns can last 10-15 years, requiring good oral hygiene and regular dental check-ups.
If your dentist has recommended a dental crown, you might be wondering what the process actually involves. Understanding each step can help ease any concerns and prepare you for what’s ahead. Whether you need a crown due to a cracked tooth, severe decay, or after a root canal, knowing what to expect makes the entire experience much smoother and less stressful.
The dental crown process is actually more straightforward than most people think. It typically involves two main appointments separated by a week or two, during which your custom crown is being crafted in a dental lab. Some practices even offer same-day crowns using advanced digital technology, cutting the process down to just one visit. Let’s walk through each step together so you’ll feel confident and informed about your upcoming treatment.
At Dental Theory, we believe that knowledge empowers patients to make the best decisions for their oral health. We’re here to guide you through every step of the dental crown process with care, compassion, and expertise.

Understanding What a Dental Crown Is and Why You Need One
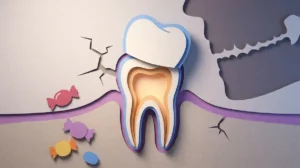
A dental crown is essentially a custom-made cap that fits over your entire tooth, restoring its shape, size, strength, and appearance. Think of it as a protective helmet for your tooth that not only looks natural but also functions just like your original tooth. Crowns are incredibly versatile and solve numerous dental problems that simpler treatments can’t address.
You might need a crown for several reasons: to protect a weak tooth from breaking, restore a broken tooth, cover a tooth with a large filling when there isn’t enough tooth structure left, hold a dental bridge in place, cover misshapen or severely discolored teeth, or protect a tooth after root canal therapy. Crowns are also commonly used in cosmetic dentistry to create a beautiful, uniform smile.

Step 1: Initial Consultation and Comprehensive Examination
Your dental crown journey begins with a thorough consultation where your dentist evaluates whether a crown is the right solution for your specific situation. This isn’t just a quick look—it’s a comprehensive examination that sets the foundation for your entire treatment.
During this appointment, your dentist will take X-rays or digital scans to assess the tooth structure, roots, and surrounding bone. This imaging helps identify any underlying issues like decay, infection, or bone loss that need to be addressed before placing the crown. Your dentist will also examine the tooth visually and check your bite to ensure the crown will fit properly within your dental alignment.
This is the perfect time to discuss your options regarding crown materials. Porcelain and ceramic crowns offer excellent aesthetics and are ideal for front teeth, while zirconia provides exceptional strength for back molars. Metal alloys are incredibly durable but less aesthetic, and porcelain-fused-to-metal combines strength with appearance. Your dentist will recommend the best material based on the tooth’s location, your bite force, and your aesthetic preferences.
What Questions Should You Ask?
Don’t hesitate to ask questions during your consultation! Important topics to discuss include the estimated cost and insurance coverage, how long the crown should last with proper care, whether you need any preliminary treatments like fillings or root canals, and what type of temporary crown you’ll have. An informed patient is a confident patient, and your dental team wants you to feel comfortable with your treatment plan.

Step 2: Tooth Preparation and Reshaping
Once you’ve decided to move forward with the crown, the actual procedure begins with tooth preparation. This appointment typically lasts about 90 minutes and is performed under local anesthesia to ensure your comfort throughout the process.
The tooth preparation involves reshaping your tooth to create an ideal foundation for the crown. Your dentist will carefully remove a thin layer of enamel from all around the tooth—typically about 1-2 millimeters—to make room for the crown to fit properly without making your bite feel too high. This might sound concerning, but remember that the crown will restore the tooth to its original size and shape.
If your tooth has decay, your dentist will remove all the damaged tissue during this step. Conversely, if the tooth is broken or has insufficient structure, your dentist may need to build it up using filling material called a core buildup. This creates a stable foundation that can properly support the crown.
| Tooth Preparation Step | Purpose | Duration |
|---|---|---|
| Anesthesia Administration | Ensure patient comfort during procedure | 5-10 minutes |
| Enamel Removal | Create space for crown placement | 20-30 minutes |
| Decay Removal or Core Buildup | Prepare healthy foundation for crown | 15-25 minutes |
| Final Shaping | Perfect the tooth contours for optimal fit | 10-15 minutes |
Is the Tooth Preparation Painful?
Most patients report feeling little to no discomfort during tooth preparation thanks to modern anesthetics. The local anesthesia numbs the area completely, so you’ll feel pressure and vibration from the dental instruments but no sharp pain. After the procedure, you might experience some sensitivity for a few days, but this is completely normal and manageable with over-the-counter pain relievers.

Step 3: Taking Impressions or Digital Scans
After your tooth is properly prepared, the next critical step is capturing its exact shape and size so the dental lab can create your custom crown. This is where precision becomes paramount—the accuracy of this step directly affects how well your final crown will fit.
Many modern dental practices now use digital impression technology, which involves scanning your teeth with a handheld wand that captures thousands of images per second. These images are compiled into a highly accurate 3D model of your prepared tooth and surrounding teeth. Digital impressions are faster, more comfortable, and typically more accurate than traditional methods.
Traditional impressions use a putty-like material that’s placed in a tray and held in your mouth for a few minutes while it sets. While some patients find this method less comfortable due to the material’s texture and the potential for gagging, it’s still an effective and reliable technique that produces excellent results.
Your dentist will also take impressions of your opposing teeth (the teeth that bite against the tooth receiving the crown) and record your bite relationship. This ensures your new crown will fit harmoniously with your existing bite pattern and won’t cause jaw discomfort or uneven wear.
Step 4: Temporary Crown Placement and Care
While your permanent crown is being custom-crafted in a dental laboratory—a process that typically takes one to two weeks—you’ll need protection for your prepared tooth. This is where the temporary crown comes in, serving as a placeholder that protects the vulnerable tooth structure.
Your dentist will place a temporary crown made of acrylic or composite resin. This temporary restoration is attached with temporary cement that’s designed to be easily removed when your permanent crown is ready. While temporary crowns are functional, they’re not as durable as the permanent version, so you’ll need to take some precautions.
How to Care for Your Temporary Crown
- Avoid sticky or chewy foods like caramel, taffy, or chewing gum that could pull the temporary crown off.
- Chew on the opposite side of your mouth when eating to minimize stress on the temporary crown.
- Be gentle when brushing and flossing around the temporary crown. When flossing, slide the floss out sideways rather than pulling up, which could dislodge the crown.
- Skip very hard foods like raw carrots, hard candy, or ice that could crack the temporary material.
- Contact your dentist immediately if the temporary crown falls off or breaks, as the exposed tooth can become sensitive and damaged.
Most patients adjust to their temporary crown within a day or two. You might notice it feels slightly different from your natural teeth, but this is normal. The temporary crown is simply holding the space and protecting your tooth—the permanent crown will feel much more natural and comfortable.
Step 5: Crown Fabrication in the Dental Laboratory
While you’re going about your daily life with your temporary crown, skilled dental technicians are hard at work creating your custom permanent crown. This behind-the-scenes process is where artistry meets precision engineering.
The fabrication process begins with the impressions or digital scans sent to the laboratory. Technicians use these detailed specifications to create a crown that matches your tooth’s exact size, shape, and—if you’ve chosen a tooth-colored material—the precise shade of your surrounding teeth. This customization is what makes dental crowns look and feel so natural.
Different materials require different fabrication techniques. Porcelain and ceramic crowns are built up in layers and fired in special ovens to achieve their strength and translucency. Zirconia crowns are milled from solid blocks using computer-aided design and manufacturing (CAD/CAM) technology. Metal crowns are cast using the lost-wax technique, a time-honored method that produces incredibly accurate restorations.
| Crown Material | Advantages | Best Used For |
|---|---|---|
| Porcelain/Ceramic | Excellent aesthetics, natural appearance | Front teeth, visible areas |
| Zirconia | Superior strength, good aesthetics | Back molars, heavy chewing areas |
| Porcelain-Fused-to-Metal | Strong with good appearance | Back teeth needing durability |
| Gold Alloy | Extremely durable, gentle on opposing teeth | Back molars when aesthetics aren’t priority |
Same-Day Crown Technology
Some dental practices, including those offering advanced general dentistry services, now have in-office milling machines that can create your crown in a single visit. This technology uses digital scans to design and mill your crown from a solid block of ceramic material in about an hour, eliminating the need for temporary crowns and multiple appointments. While not suitable for every situation, same-day crowns offer incredible convenience for many patients.
Step 6: Final Crown Placement and Cementation
After approximately one to two weeks, your permanent crown is ready, and it’s time for your final appointment. This visit is typically shorter and less involved than the preparation appointment, usually taking about 30-45 minutes.
Your dentist will begin by carefully removing the temporary crown and cleaning any remaining temporary cement from your prepared tooth. They’ll then place the permanent crown on the tooth to check the fit, appearance, and bite. This trial fitting is crucial—your dentist will make sure the crown isn’t too high or too low, that it fits snugly against adjacent teeth without creating tight spaces where food could trap, and that the color blends naturally with your other teeth.
You’ll have the opportunity to look at the crown and provide feedback. If any adjustments are needed, your dentist can make minor modifications right there in the office. Once everyone is satisfied with the fit and appearance, your dentist will permanently cement the crown in place using dental cement that creates a strong, long-lasting bond.
What Happens During the Cementation Process?
- Tooth preparation: The prepared tooth is thoroughly cleaned and dried.
- Crown preparation: The inside of the crown is treated with bonding agents.
- Cement application: Dental cement is applied to the crown’s interior.
- Crown placement: The crown is carefully positioned on the tooth.
- Excess removal: Excess cement is cleaned away from around the crown.
- Final curing: Special lights may be used to harden the cement.
- Bite check: Your dentist confirms your bite feels comfortable and natural.
Don’t be surprised if your new crown feels a bit strange at first. Your mouth is incredibly sensitive to even tiny changes, so you’ll definitely notice the new crown. However, most patients adapt within a few days as their tongue and cheeks get used to the restoration.
Post-Procedure Care and Long-Term Maintenance
Congratulations! Your dental crown process is complete, but maintaining your new restoration is essential for its longevity. With proper care, dental crowns can last 10-15 years or even longer.
Immediately after crown placement, you might experience some sensitivity to hot or cold temperatures, especially if the underlying tooth still has its nerve. This sensitivity typically subsides within a few weeks. If it persists or worsens, contact your dentist, as it could indicate that the crown is too high or that there’s an issue with the underlying tooth.
For the first 24 hours after permanent crown placement, stick to soft foods and avoid chewing on that side of your mouth if possible. This gives the cement time to fully harden and ensures the strongest possible bond. After that initial period, you can return to eating normally, though there are some long-term precautions you should take.
Essential Care Tips for Your Dental Crown
- Maintain excellent oral hygiene: Brush twice daily and floss daily, paying special attention to the area where the crown meets your gum line. This junction is where bacteria can accumulate and cause decay in the underlying tooth.
- Avoid extremely hard foods: While crowns are strong, they’re not indestructible. Avoid chewing ice, hard candy, or using your teeth to open packages.
- Protect against grinding: If you grind or clench your teeth at night, ask your dentist about a nightguard to protect your crown and other teeth from excessive wear.
- Don’t skip dental checkups: Regular professional cleanings and examinations help ensure your crown and surrounding teeth stay healthy.
- Address problems promptly: If your crown feels loose, high, or uncomfortable, or if you notice any chipping or damage, contact your dentist right away.
Common Concerns and What to Watch For
While dental crowns are highly successful restorations, it’s important to know what’s normal and what requires professional attention. Some sensitivity is normal for the first few weeks, especially to temperature changes. However, sharp pain when biting down or persistent severe sensitivity could indicate that the crown is sitting too high or that there’s an issue with the tooth itself.
Sometimes crowns can become loose over time if the cement washes out. If your crown feels loose or wiggly, don’t try to remove it yourself—keep it in place if possible and see your dentist immediately. A loose crown that stays in place can often be re-cemented, but one that falls out may need to be remade if it becomes damaged.
You should also watch the gumline around your crowned tooth. While some initial inflammation is normal as your gums adjust to the crown’s margins, persistent redness, swelling, or bleeding could indicate that the crown’s edge is irritating your gum tissue or that bacteria are accumulating in that area. Your dentist can address these issues during regular checkups or sooner if symptoms are concerning.
| Symptom | Normal or Concerning? | Recommended Action |
|---|---|---|
| Mild sensitivity for 1-2 weeks | Normal | Use sensitive toothpaste, avoid extreme temperatures |
| Pain when biting | Concerning | Contact dentist—crown may need adjustment |
| Crown feels loose | Concerning | See dentist immediately for re-cementation |
| Small chip in crown material | Moderate concern | Schedule appointment—may be repairable |
| Dark line at gumline (metal crowns) | Normal | Cosmetic only—mention at checkup if bothersome |
Making the Investment in Your Smile Worth It
Getting a dental crown is an investment in your oral health, comfort, and confidence. Understanding the process from start to finish helps you approach treatment with realistic expectations and the knowledge to take great care of your restoration.
The dental crown process, while involving multiple steps and appointments, is a well-established and highly successful procedure. Millions of crowns are placed each year, helping people preserve their natural teeth, restore function, and improve their smiles. The technology and materials continue to advance, making today’s crowns more durable, comfortable, and natural-looking than ever before.
At Dental Theory, we’re committed to making your dental crown experience as smooth and comfortable as possible. Our team uses the latest technology and techniques to ensure your crown fits perfectly and lasts for many years. We take the time to explain each step, answer your questions, and provide personalized care that puts your comfort first.
If you’re ready to restore your smile and protect a damaged tooth with a dental crown, we’re here to help. Schedule an appointment with our experienced team to discuss your options and begin your journey to a healthier, more confident smile. You can also visit us on Google to learn more about what our patients are saying about their experiences at our Brandon, FL practice.
FAQs
Q: How long does the entire dental crown process take?
A: The traditional dental crown process typically takes two appointments over the course of two to three weeks. Your first appointment for tooth preparation and impressions takes about 90 minutes, then you’ll wear a temporary crown while the permanent one is being made. The final placement appointment usually takes 30-45 minutes. Some practices offer same-day crowns that can be completed in a single visit of about two to three hours total.
Q: Is getting a dental crown painful?
A: Most patients experience little to no pain during the crown procedure because your dentist uses local anesthesia to numb the area completely. You might feel pressure and vibration from the dental instruments, but not sharp pain. After the anesthesia wears off, you may have some mild sensitivity or soreness for a few days, which is easily managed with over-the-counter pain relievers. Once your permanent crown is placed and you’ve adjusted to it, it should feel completely natural and pain-free.
Q: What happens if my temporary crown falls off?
A: If your temporary crown falls off, contact your dentist right away—even if it’s after hours, most practices have emergency numbers. Keep the crown safe and clean, and avoid chewing on that side of your mouth. In many cases, your dentist can simply re-cement the temporary crown back in place. Don’t leave the prepared tooth exposed for long periods, as it can become sensitive, damaged, or shift position, which could affect how well your permanent crown fits.
Q: How long do dental crowns last?
A: With proper care and maintenance, dental crowns typically last between 10 to 15 years, though many last even longer. The longevity of your crown depends on several factors including the material used, your oral hygiene habits, whether you grind your teeth, and how much wear and tear the crown experiences. Regular dental checkups, excellent home care, and avoiding habits like chewing ice or using your teeth as tools will help maximize your crown’s lifespan.
Q: Can I eat normally with a dental crown?
A: Yes, once your permanent crown is fully set (usually after the first 24 hours), you can eat normally. Dental crowns are designed to function just like natural teeth and can handle regular chewing forces. However, it’s smart to avoid extremely hard foods like ice or hard candy, and be cautious with very sticky foods that could potentially pull at the crown. Most people find that after a brief adjustment period, their crown feels so natural they forget which tooth has the restoration!